Please bear with me, due to DSL not being available in the very rural area where I live, photos will not be ordered nicely and may look like a 5yo started blogging due to the app I have to use not being proficient enough to withstand my awesomeness.
Once upon the other day, I had a thawed packaged of sausage that needed to be cooked. The sad little pork sausage was all alone in the fridge and had never been to the crock before. I decided to take pity on the pork and have a party! ....in my crock pot (rhymes with "that's what SHE said...")
We grow our own Yellow Finn potatoes which are VERY thin-skinned...
(They take everything personally, speak in funny accents, insult you and then run away. Divas, really.)
...and so do very well in a crock setting. I also have 7 wonderful chickens (Bunny, Freckles, Happy, Mescal, Honey, Hazel, and the blond, Marilyn) who have no idea that most of their brethren (sisteren?) stop laying during the winter. Or, maybe they do know and they're rebels. Or, maybe they don't care because they're just so darn happy! They ALL lay an egg every single day.
So on this particular day here I am with 30 eggs, a package of sausage, plenty of potatoes.... and I'm thinking PARTY!
An omelette is just a culinary party, isn't it? I think so!
Here's what you'll need:
1 pkg Pork Sausage, crumbled & cooked
10 Sm-Med Potatoes
20 Eggs (2 per potato used)
4oz Cheddar Cheese,
Optional: small can of sliced mushrooms, I used unsalted
Grease your crock
Crack in all of your eggs
Mix in the sausage
Toss in the potatoes
Throw in some cheese
Do the Crocky Pocky and mix it all around
THAT'S WHAT ITS ALL ABOUT!!
Shred ya some fromage (that's french for "cheese". I feel fancy today. Plus, I haven't shaved in about 3 days and its probably time to wax my mustache.)
Cook on LOW for about 6 hours (you'll see when the eggs are done)
Mmmmmmmmm yummmmmyyy!
Feel free to toss in any other ingredients you'd normally use in an omelette EXCEPT FOR DAIRY PRODUCTS because it will spoil being cooked on low for such a long period of time.
Sunday, February 19, 2012


Monday, January 30, 2012
Jennifer C's Easy Peasy Crocked Lasagna

I admit, I was a creep. I was one of those nosy, creepy people. I "met" Jennifer C on a Campbell's Soup Facebook posting. She had mentioned to the masses that she had a very easy lasagna recipe and I, of course, am all for making any of my dinners in a lazier (EASIER. Whatever.) fashion so I, along with several other people, requested her to shareth with uth.
Jennifer, being the gracious facebooker she is, DID email me the recipe! It differs from the other Lasagna recipe on my blog in the sauce and type of noodles so I decided to go ahead and give you this option as well!
Get you some:
1-2 pkg Burger, browned. I used 1pkg deer burger and 1pkg elk sausage
1 lg jar or can Spaghetti Sauce
1 1/2 cups Mozzrella Cheese, shredded as small as possible
1 15 or 16oz container Ricotta
1/2 cup Parmesan Cheese, shredded as small as possible
3/4 of a 16oz container of cottage cheese 1pkg No-Boil or Oven Ready Lasagna Noodles, uncooked
Italian Seasoning
or
Parsley & Garlic
Make sure to drain your burger very well after you brown it. I ended up using about 3/4 of the 2 packages. The other 1/4 I gave to my poor old puppy who was very studiously NOT looking at the food. I feel that using both packages would have resulted in a higher meat-to-sauce ratio than I would have liked. That's a technical term, btw. Used in highly refined french restaurants.
"Louis, I find zees meat-to-sauce ratio is highly unpalatable. You disgust me, you vile pigsnot! Your mother was a hamster and your father smelt of elderberries!"
*smacks Louis in the face with white glove*
It could happen.
I digress, as always.
I had made chili the day before and had an extra cup or two of crushed tomatoes (I love crushed tomatoes. They go in EVERYTHING.) so I added that to my favorite Francesco Rindaldi pasta sauce. What can I say? I'm a sauce girl.
I'm not sassy, I'm SAUCY!

Add the burger to the sauce and LIGHTLY sprinkle Italian Seasoning over it (you can hardly see the Italian Seasoning in this photo because I'm me and I buried it with garlic salt). Set aside.


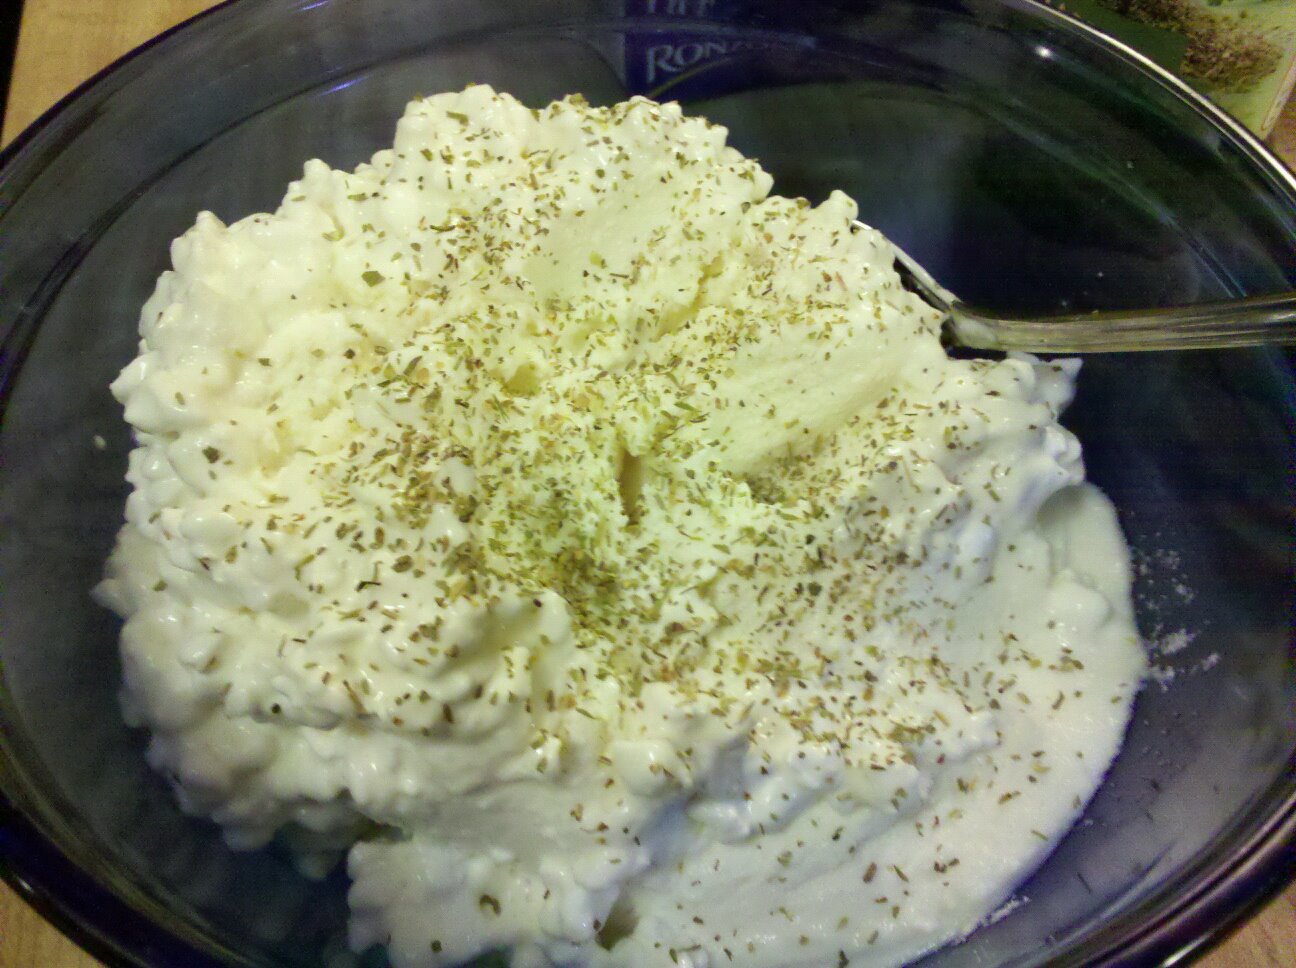
You'll want to mix together the 3/4 container of cottage cheese (and if you're like me, pause to eat the rest) with the ricotta cheese and sprinkle a LIGHT dusting of your Italian Seasoning or Parsley over it (and then if you're still me, sprinkle California Blend Garlic Salt over that).
Now you'll want to grate your mozzarella over the cheese mixture. Mix in the parmesan cheese. Use the finest grade of grater (the greatest) because the smaller the shred the easier it will be to mix and spread. Set aside.

I cut off about 1/3 of a brick of mozzarella, shredding 2/3 of THAT and then reserving the last 1/3 for shredding over the final layer of lasagna.
Can we build it?! YES WE CAN!
I used my 7qt crock for this and it ended up filling it halfway or just over halfway.
I'm assuming you've protected your crock by greasing it. No one wants to eat from an unprotected crock. You might get burnt. Pieces, that is.
I had never heard of "No Boil" or "Oven Ready" noodles but I really wanted to try it exactly as Jennifer suggested so I found these and decided to give them a go

*NOTE You can crock a lasagna with the regular lasagna noodles, uncooked. Crocking has no loss of liquid so they are cooked just fine with the amount of liquid in the recipe.
Spoon a light layer of meatsauce onto the bottom and cover it with a layer of noodles. As you see, you can break them to fit. Try not to touch the sides with the noodles if you can. They will burn. Some layers I did a double layer of noodles. I bought 2 packages (just in case) and ended up using 1 1/2 pkgs. The recipe suggests 1 package and that would have been just fine.

Now you'll want to carefully spread your cheese mixture over the noodles. I noticed that with a finer shred of cheese, it didn't conglomo to the layer of noodles after cooking as badly as the larger shred did.

Now you'll continue with repeating sauce then noodle then cheese, (I had about 3 layers total) ending with sauce and then shred the last 1/3 of the mozzarella over the top to make it purty-like.

Cook on LOW for 3 to 4 hours or HIGH for 1 to 2
I put mine together the night before I wanted to serve it and loved how easy it was to do. I loved the taste! I really think adding the spices to the cheese was a great move. The ONLY thing that I didn't groove on was that the noodles weren't cooked all the way. I had mine on LOW for 3 1/2 hours and turned it to warm for a half hour because the edges of the noodles were starting to burn.
HOWEVER....
When I ate the lasagna the next day, no noodle issue! They must have soaked up more liquid overnight because it was perfect and the flavor was EVEN BETTER!! In fact, I thought about making this one day and not serving it until the next!
I put mine together the night before I wanted to serve it and loved how easy it was to do. I loved the taste! I really think adding the spices to the cheese was a great move. The ONLY thing that I didn't groove on was that the noodles weren't cooked all the way. I had mine on LOW for 3 1/2 hours and turned it to warm for a half hour because the edges of the noodles were starting to burn.
HOWEVER....
When I ate the lasagna the next day, no noodle issue! They must have soaked up more liquid overnight because it was perfect and the flavor was EVEN BETTER!! In fact, I thought about making this one day and not serving it until the next!
Saturday, January 21, 2012
Lazy Baked Spaghetti

Pictured with The Best French Bread
Baking spaghetti just does a little something, adds a certain je ne sais quoi, to the flavor and texture. If you love spaghetti as much as I do, you've GOT to try doing this to yours because it's the easiest most lazy way to kick your dinner up a notch!
How lazy is it??

If you have a favorite spaghetti recipe, use it and then go to the "AND NOW" step.
If not, get together:
Noodles
Spaghetti Sauce I've tried all kinds and I really like Francesco Rinaldi because it is good
!!Cheese!! I use about a brick each time. One time I did a half brick of shredded sharp cheddar

AND NOW, you'll want to cook your noodles the normal length of time you like them cooked. When using a crock, we wouldn't cook them as long as usual but for this recipe you'll just pretty much make spaghetti as you would any other time.
While your noodles are boiling, put your sauce in a pan and warm it up. Add SOME of the cheese to it but leave enough to cover the top of the spaghetti when you put it in a baking dish. I normally add 1/3 of the cheese to my sauce, reserving 2/3 for the top.
Use Crisco to grease your baking dish.
Preheat oven to 350*
Mix sauce and noodles together and pour into the dish. Cover with the remaining 2/3 grated cheese.

Insert toothpicks at regular intervals so that foil will not touch and stick to the cheese.

Baking spaghetti just does a little something, adds a certain je ne sais quoi, to the flavor and texture. If you love spaghetti as much as I do, you've GOT to try doing this to yours because it's the easiest most lazy way to kick your dinner up a notch!
How lazy is it??
My pooch Abby

THIS LAZY!!
If you have a favorite spaghetti recipe, use it and then go to the "AND NOW" step.
If not, get together:
Noodles
Spaghetti Sauce I've tried all kinds and I really like Francesco Rinaldi because it is good
on it's own but also very good as a base to build on. I'm still refining a recipe to use from scratch and hope to have a post on that soon. Make sure
you have ENOUGH sauce. In baking it, too much is better than not enough.
!!Cheese!! I use about a brick each time. One time I did a half brick of shredded sharp cheddar
plus a half brick of shredded mozzarella. In the photo I used 2/3 brick of shredded sharp
cheddar and 5 pieces of packaged pre-sliced Velveeta.
My husband calls this recipe "that stupid crazy cheesy baked spaghetti you
make". I've been trying to get him back in the late 80's and early 90's
where he belongs but. HE. JUST. WONT. GO.
because he's
dung dung dung dungalunglung
vanilla ice ice baby
vanilla ice ice baby
AND NOW, you'll want to cook your noodles the normal length of time you like them cooked. When using a crock, we wouldn't cook them as long as usual but for this recipe you'll just pretty much make spaghetti as you would any other time.
While your noodles are boiling, put your sauce in a pan and warm it up. Add SOME of the cheese to it but leave enough to cover the top of the spaghetti when you put it in a baking dish. I normally add 1/3 of the cheese to my sauce, reserving 2/3 for the top.
Use Crisco to grease your baking dish.
Preheat oven to 350*
Mix sauce and noodles together and pour into the dish. Cover with the remaining 2/3 grated cheese.

Insert toothpicks at regular intervals so that foil will not touch and stick to the cheese.

Cover with aluminum foil and bake for 25 to 30 minutes depending on how deep your dish is.
The cheese should be nice and melted but not burnt or crisp. If you'd like it crisp, uncover it after 25 minutes, turn the heat up to 400* and bake until it's as crisp as you like.

It will take awhile to cool (at least 20 mins) so while it's cooling, it would be a good time to be baking your loaf of The Best French Bread.
And here's a little prezzie for you, my dearly beloved blog reader!
The Best French Bread

Ah, I see you have arrived via the Garlic Bread And French Bread Dough Recipe.
I'm sorry that I don't have a plethora of visual stimuli to increase your salivatory glands but follow these directions and smell for yourself how amazing this bread is!
You require the following:
Butter
Garlic paraphernalia
You've already got your dough (if not, click HERE) and you just punched it down (I am outside watching you) so here's what you want to do next:
Gently roll the dough into a large fuzzy caterpillar.

WHAAAAAAaaaa????
Yes. Just do it.

Uh-huh. You're seein' it now.
Caterpillar I telled you!
~~~You're still thinking about it, aren't you?~~~

Tuck the ends under, pinch any seams together, and keep all seams under the loaf (touching the pan).
Cover with the oiled cling wrap and let it rise for about 20 minutes.

Bake at 350* for 25 minutes.
While the bread is baking, make a mixture of butter and your favorite garlic seasonings. I take a stick of unsalted butter, put it into a cup and shake my California Blend Garlic Salt into it, add a bit of minced garlic and microwave it until it's melted. Taste and add garlic as necessary.
Let the loaf cool for 15 minutes.
Cut loaf in half and brush with the garlic butter mixture.
Place both halves back on the cookie sheet (butter up) and broil for a few minutes until it's reached your desired crispiness.
Zis ees zee best French Bread... BON APPETIT!
Barton's Cheesy Buttery Garlic Bread

...you're wishing you could scratch and sniff your computer monitor right now...
Using the Garlic Bread And French Bread Dough Recipe, you've gotten to this point.
You have chosen this option well, Grasshoppa!
What I've chosen to do is to braid my bread so that it becomes pull-apart serving.
You'll need:
Butter
Garlic paraphernalia
Cheese some sort of white, I use mozzarella because I can't find white cheddar locally
Dough from the Garlic Bread And French Bread Dough Recipe
To make 2 baguettes: Section the dough into 2 pieces. Roll each out into a long noodle almost the length of the cookie sheet. Wrap the ends underneath and make sure any seams are on the bottom (touching the pan). Lay them both on the cookie sheet a few inches apart. Cover with the oiled cling wrap.
To braid: Section the dough into 3 separate pieces. I've found it easiest to loosely roll the dough and then pinch and twist to separate.
Roll (literally roll the dough, not "use a rolling pin to roll it flat". you're making a strand, here.) each section out to the length you'd like your bread to be. It WILL stretch out a bit more during it's second rising so don't worry.
Fun Fact: Rolling the dough lines up the grains, so to speak. When you pull garlic bread apart you'll notice that the bread all sort of goes one way. Think "string cheese".
It's much easier to have one person hold the ends together while you braid the rest (exactly like hair only less pulling and whining) but if you don't have someone around, just start braiding one side and then go to the other side and braid it out. Make sure to pinch the ends together and tuck them underneath. Try not to pull on the strands too much, it will break them. Cover loosely with the oiled cling wrap.

NOW: Preheat your oven to 350* and let the dough rise for about 20 minutes or so. As the loaf is rising you can very gently lift the ends one side at a time and tug it longer. I do this about 3 or 4 times.
Bake it for about 20 minutes.
I'm sure you've remembered to take the cling wrap off first.
While the bread is baking, make a mixture of butter and your favorite garlic seasonings. I take a stick of unsalted butter, put it into a cup and shake my California Blend Garlic Salt into it, add a bit of minced garlic and microwave it until it's melted. Taste and add garlic as necessary.
Pull the loaf of the oven and brush it with the garlic butter mixture.
Bake for another 5 minutes. It should be lightly browned.
Slice your cheese into 1" squares (one square for every "bump" or inch if baguette)
Take the loaf out and let it cool for 15 minutes. Keep the oven on.

After the bread has cooled, cut slits 2/3 into each bump and down the center in a zigzag (if you've chosen to make 2 baguettes instead of 1 loaf, you would cut a slit about every inch) taking care not to cut down to the bottom.

Use a brush to fill the slits with the garlic butter mixture. Press 1 cheese square into every bump (or inch, if baguette).

Dough from the Garlic Bread And French Bread Dough Recipe
To make 2 baguettes: Section the dough into 2 pieces. Roll each out into a long noodle almost the length of the cookie sheet. Wrap the ends underneath and make sure any seams are on the bottom (touching the pan). Lay them both on the cookie sheet a few inches apart. Cover with the oiled cling wrap.
To braid: Section the dough into 3 separate pieces. I've found it easiest to loosely roll the dough and then pinch and twist to separate.
Roll (literally roll the dough, not "use a rolling pin to roll it flat". you're making a strand, here.) each section out to the length you'd like your bread to be. It WILL stretch out a bit more during it's second rising so don't worry.
Fun Fact: Rolling the dough lines up the grains, so to speak. When you pull garlic bread apart you'll notice that the bread all sort of goes one way. Think "string cheese".
It's much easier to have one person hold the ends together while you braid the rest (exactly like hair only less pulling and whining) but if you don't have someone around, just start braiding one side and then go to the other side and braid it out. Make sure to pinch the ends together and tuck them underneath. Try not to pull on the strands too much, it will break them. Cover loosely with the oiled cling wrap.

NOW: Preheat your oven to 350* and let the dough rise for about 20 minutes or so. As the loaf is rising you can very gently lift the ends one side at a time and tug it longer. I do this about 3 or 4 times.
Bake it for about 20 minutes.
I'm sure you've remembered to take the cling wrap off first.
While the bread is baking, make a mixture of butter and your favorite garlic seasonings. I take a stick of unsalted butter, put it into a cup and shake my California Blend Garlic Salt into it, add a bit of minced garlic and microwave it until it's melted. Taste and add garlic as necessary.
Pull the loaf of the oven and brush it with the garlic butter mixture.
Bake for another 5 minutes. It should be lightly browned.
Slice your cheese into 1" squares (one square for every "bump" or inch if baguette)
Take the loaf out and let it cool for 15 minutes. Keep the oven on.

After the bread has cooled, cut slits 2/3 into each bump and down the center in a zigzag (if you've chosen to make 2 baguettes instead of 1 loaf, you would cut a slit about every inch) taking care not to cut down to the bottom.

Use a brush to fill the slits with the garlic butter mixture. Press 1 cheese square into every bump (or inch, if baguette).


Garlic Bread and French Bread Dough Recipe

OOoooOOOooOOoo SOOKIE SOOKIE
That's right, it's the bread you've been waiting for!! This recipe is EXTREMELY versatile and I'm going to show you TWO different ways to use this recipe today along with a few Super Tips that you'll be able to use for the rest. of your. culinary. LIFE.
Let's get our stuff together!
1 C Milk warm
1 tbsp Honey
2 1/4 tsp Active Dry Yeast or 1 packet
3 C Bread Flour no bread flour? no worry! use regular flour if you need to, it'll be fine
1 tsp Salt
To warm the milk you'll want to use a microwave safe container, microwave and stir in 20 second increments. You don't want to burn the milk or break it down any more than absolutely necessary. If you don't have a thermometer (I don't) you'll know its warm enough when it's not as warm as you'd like to drink your coffee or espresso. You know the temp I'm talking about. The one where you take a sip and make the face because it's all in-between and weird so you head over to the microwave because you were REALLY looking forward to having an amazing sip and it was just TOO gross. THAT temperature. I suppose people call it lukewarm, whatever...
While you're microwaving your milk, put your tightly sealed honey container in your kitchen sink on it's side and run hot water over it. I've found that this is the best way to get my honey moving (other than crying or yelling) and you're doing two things at the same time, you ANIMAL you!
If you're REALLY talented <bowing> you'll also be measuring out the yeast into your mixing bowl.
While you're microwaving your milk, put your tightly sealed honey container in your kitchen sink on it's side and run hot water over it. I've found that this is the best way to get my honey moving (other than crying or yelling) and you're doing two things at the same time, you ANIMAL you!
If you're REALLY talented <bowing> you'll also be measuring out the yeast into your mixing bowl.
Just a "real quick" here, use a knife with a flat edge on the back
to flatten out your measurements. Scoop and Scrape, people!
Scoop and Scrape!
Except flour. Spoon the flour into the measuring cup
and THEN scrape! This will ensure consistent amounts.
So you've got your yeast in the mixing bowl, pour in your NOT-HOT milk and then measure in your tablespoon of honey. Your yeast will be warm and snug and have plenty of food so just let it relax for 5 minutes while you prepare your cookie sheet.

Pour a dash of olive oil on your cookie sheet, spread a sheet of cling wrap over it and rub it in well so that the cling wrap has a fine film on it. Peel the cling wrap back to one side and go back to your yeast/honey/milk mixture.
Add in 1 C of the flour, stir once or twice.
StoryTime Break: one day I only had 1 1/2 C of my bread flour left so I used that along with 1 1/2 C of my all-purpose unbleached white flour. It turned out JUST FINE. The bread flour has more gluten in it which makes it stretchier and chewier but no one (including me) noticed a difference. The End
StoryTime Break: one day I only had 1 1/2 C of my bread flour left so I used that along with 1 1/2 C of my all-purpose unbleached white flour. It turned out JUST FINE. The bread flour has more gluten in it which makes it stretchier and chewier but no one (including me) noticed a difference. The End
Add the teaspoon of salt, stir once or twice.
-option at this point: add a dash of garlic powder (NOT garlic salt or minced garlic) to the mix-
Add 1 C of the flour, stir once or twice.
Add the last C of the flour and stir (or use the "fold" option on your mixer. I love my Cuisinart) until the dough starts to leave the sides of the bowl.
By Hand: knead for 8 to 10 minutes until dough is no longer sticky and stretches well.
By Stand Mixer: mix on LOW (2) using the dough hook for 8 to 10 minutes until dough is no longer sticky and stretches well.
Wrap the dough into a ball with any seams being on the bottom. Pinch seams together.
Roll the ball on the oiled cookie sheet until the outside is covered in a layer of olive oil.

Cover the ball of dough loosely with the cling wrap. Too tight will cause the ball to not expand as well.

Let the dough rise for about an hour until it is doubled in size.

Peel back the cling wrap and push the dough flat with your hands. I love this part!
Now you have a few choices as to what you can do with the dough! Click the links to find directions for the choices.
OR
2. Make The Best French Bread

of which I do not have a "Fully Cooked" photo of because my sweet loved ones at home consumed it before it could be taken.
Either one of the recipe's would go well with my Baked Spaghetti (pictured is The Best Garlic Bread)
Either one of the recipe's would go well with my Baked Spaghetti (pictured is The Best Garlic Bread)

No matter what you decide to make with it, for a loaf this size you'll want to bake at 350* for 25 minutes with the Barton's Cheesy Buttery Garlic Bread having a few more steps after that initial bake time.
As always, PLEASE leave any comments, questions or suggestions as I am motivated by the feedback I receive.
Tuesday, December 27, 2011
Stock Your Kitchen - Foods & Spices
It hasn't been a year yet (barely 6 months) since I've truly started cooking (true cooking involves a recipe, a plan and actually caring about the food you're making) and I've noticed that there are quite a few recipes that use the same ingredients. There are also at least 3 meals I can think of this second that I can make in an emergency because the ingredients are those that won't perish quickly and so I always make sure to have them on hand.
Also, when I got my first apartment I really could have used a guide when I went shopping to stock the cupboards. Had I been able to find one, I probably wouldn't be so late in starting my culinary fixation.
C'est la vie!
However I got here, here I am, giving you a guide that I could use myself. Please remember that this is great for my family and the foods we regularly eat (and recipes I am attracted to making) so feel complete freedom to add your own ingredients or spices if I have left your favorites out.
*I wish I were a pro and had everything organized by location in the grocery store, but instead I'm listing them as I find them in my own kitchen. Welcome to the layout of my pantry & spice rack!*
Green Beans
Peas
Mixed Vegetables (great for emergency meals & pot pies)
Sliced Carrots (great snack kids love, emergency meals, filler)
Olives
Pineapple
Pinto Beans
White Beans (use in place of Great Northern)
Tomato Sauce (not to be confused with spaghetti sauce)
Tomato Paste
Diced Tomatoes (with AND without italian spices)
Canned Mushrooms (sliced or whole in jar)
Chicken Broth
Beef Broth
Cream of Mushroom Soup
Cream of Chicken Soup
Cream of Celery Soup
Beefy Mushroom Soup
Cheese Soup (or Nacho Cheese Soup)
Spaghetti Sauce
Spaghetti Noodles
Elbow Noodles
Egg Noodles
Instant White Rice
Secondary less used rices would be converted white & wild
Saltine Crackers
Barley (buy it once and it will last a long time)
**Brown Sugar
White Sugar
All Purpose Flour (the bit healthier unbleached if possible)
Secondary less used flours would be wheat & bread
Baking Soda
Baking Powder
Iodized Salt
Ground Pepper (I use only in recipes calling for measured amounts of pepper)
Peppercorns (use in place of ground at each opportunity)
Pure Vanilla Extract (splurge, you'll notice the difference)
Cornstarch (!!!!! Makes anything thicker & does not dilute flavor)
Parsley
Basil
Whole Bay Leaves (always use 1 in place of bits, just pluck out before serving)
Oregano
Thyme
Paprika
Cinnamon
Ground White Pepper (cannot see it in food & is MUCH stronger)
Onion Powder (I use in place of onions *shudder*)
Chicken Bouillon (adds flavor or broth in an instant)
Beef Bouillon
Italian Seasoning
California Seasoning Garlic Salt (my fav spice bar none)
Garlic Salt (the kind with Parsely is our go-to spice)
Garlic Powder
Minced Garlic
Dried Onion Soup Mix
Packaged Spices I Can't Live Without:
Meatloaf Seasoning
Country Gravy Mix
Mild Chili
Taco Seasoning
Lemon Juice
Honey
16oz Brick Cheddar Cheese
Butter Sticks
Worcestershire Sauce
Soy Sauce
Ketchup (I prefer Heinz. This is a base for a lot of great sauces)
Pickles
Applesauce
Tuna
Buy in bulk & vacuum seal:
Burger of some sort
Ground Sausage
Chicken Breasts
The majority of the list are things that you should pounce on during store sales! I'm that crazy lady you see with 25 cans of Pinto Beans in my shopping cart. When they're on sale for a dollar apiece, I don't mind the weird looks I'm given! Pinto beans are good for almost anything... soups, tacos, burritos, chili, dip....
With this list you can easily make a last minute wonderful dinner or a gourmet slow cooked delight.
**not recommended to innocently holler "where's my brown sugar at?!" When frustrated in the middle of a newly renovated Target filled with black people.
Subscribe to:
Posts (Atom)